1. ACL(Azure Confidential Ledgers) 개요
Azure Confidential Ledger 설명서
Azure confidential ledger를 사용하는 방법을 알아봅니다.
learn.microsoft.com
Azure Confidential Ledger(ACL)는 Azure 상의 완전 관리형 분산 원장(ledger) 서비스로, 민감한 데이터 변경 내역을 불변(immutable) 으로 기록하고, 신뢰할 수 있는 감사(audit) 환경을 제공.
- 변경 내역이 커밋된 후 변경될 수 없음 (immutable ledger)
- Control Plane : Azure AD 기반 인증 및 역할(권한) 제어를 통한 보안
- Data Plane : 원장 데이터를 읽기 및 쓰기가 가능한 권한을 제어
- TLS 인증서 기반의 서버 인증 및 통신
- 변경 내역에 대한 영수증(receipt) 제공 → 데이터 위변조 여부 검증 가능
즉 누가 언제 무엇을 바꿨는가를 안전하게 기록하고 증명해야 하는 시나리오에 유용함.
2. ACL 구조 이해
컨트롤 플레인(Control Plane)
- 원장 인스턴스 생성, 사용자/역할(RBAC) 관리, TLS 인증서 발급 등의 관리 작업 수행
- 예: Azure 포털, CLI, REST API를 통해 "원장 사용자 등록" 또는 "역할 부여"
- 원장에 접근할 주체(사용자, SP, MI)를 이곳에서 설정.
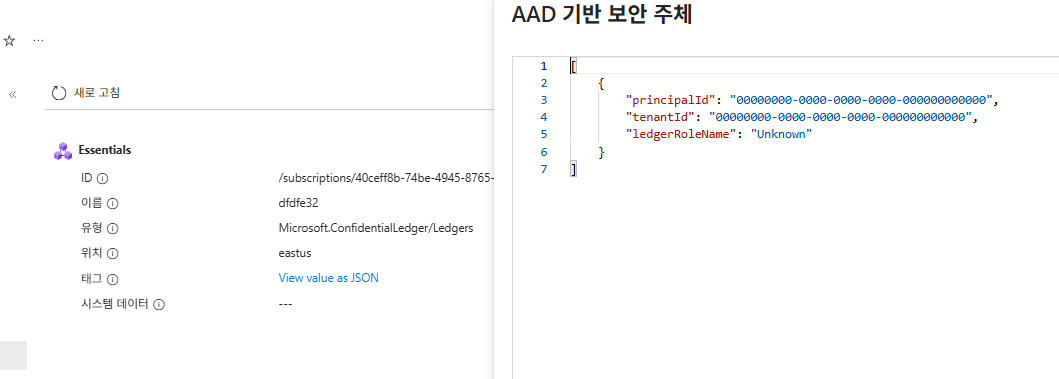
원장 인스턴스를 먼저 생성하고 이후 컨트롤 플레인을 수정할려면 az cli를 통해 업데이트 해줘야 한다.
최소 1~3개의 보안 주체를 적용할 수 있다.
  cat > aad_users.json <<'EOF'
[
  {
        "principalId": "00000000-0000-0000-0000-000000000000",
        "tenantId": "00000000-0000-0000-0000-000000000000",
        "ledgerRoleName": "Administrator"
  }

]
EOF- aad_users.json 으로 추가
az confidentialledger update \
  --name [ACL NAME] \
  --resource-group [리소스 그룹] \
--aad-based-users @aad_users.json- az confidentialledger update 명령어를 통해 진행.
az confidentialledger
Want to try using Ask Learn to clarify or guide you through this topic? Ask Learn Ask Learn Suggest a fix?
learn.microsoft.com
* 참고
데이터 플레인(Data Plane)
- 실제 데이터(트랜잭션)를 기록하고 조회하는 부분
- 예: /app/transactions (쓰기), /app/transactions/{txid}/receipt (영수증 조회) 같은 REST 엔드포인트
- 이 부분은 실제로 데이터를 “넣고/읽고” 하는 흐름
- 기본적으로 컨트롤 플레인(Control Plane)을 추가하게 되면 데이터 플레인(Date Plane)에도 추가 됨.
- 데이터 플레인만 따로 추가 할 수 있고, 추가하는거에 개수 제한은 없음.
- az cli로 데이터 플레인 권한을 추가해주는 기능은 따로 없기에 SDK 또는 REST API 등을 통해서 추가해야 됨.
az account set --subscription "[구독]"  # 구독 적용

az account get-access-token --resource https://confidential-ledger.azure.com # ACL 토큰 발급

curl -s https://identity.confidential-ledger.core.azure.com/ledgerIdentity/[ACL NAME] > id.json # TLS 인증서 발급

cat id.json | jq -r '.ledgerTlsCertificate' > ledger_tls.pem # PEM 확장자로 변환- 위 순서대로 적용
curl -X GET \
  "https://[ACL NAME].confidential-ledger.azure.com/app/users?api-version=2024-01-26-preview" \
  -H "Authorization: Bearer [ACL 토큰]" \
  --cacert ledger_tls.pem \
| jq- 데이터 플레인 권한에 적용된 Object ID 리스트들을 확인 할 수 있다.
- Azure 포탈에서도 확인 가능. (Manage users (preview))
curl -X PATCH \
  "https://[ACL NAME].confidential-ledger.azure.com/app/users/0ad842f6-62d9-45c2-8ce7-31ab82f96809?api-version=2022-05-13" \
  -H "Authorization: Bearer [ACL 토큰]" \
  -H "Content-Type: application/merge-patch+json" \
  --cacert ledger_tls.pem \
  -d '{
    "assignedRole": "Contributor"
  }' \
--silent | jq '.'- 데이터 플레인에 권한을 curl 명령어를 통해 REST 방식으로 추가.
- Azure 포탈에서도 추가 가능. (Manage users (preview))
3. 데이터 입력 방식
기본적으로 데이터를 원장에 넣는(append) 방법에는 크게 두 가지 존재함.
REST 방식과 SDK 방식
* REST 방식
curl -i --cacert ledger_tls.pem \
  -X POST "https://[ACL NAME].confidential-ledger.azure.com/app/transactions?api-version=2022-05-13" \
  -H "Content-Type: application/json" \
  -H "Authorization: Bearer [ACL 토큰]" \
-d '{"contents":"데이터데이터"}'- 데이터 입력.
curl --cacert ledger_tls.pem \
  -H "Authorization: Bearer [ACL 토큰]" \
"https://[ACL NAME].confidential-ledger.azure.com/app/transactions/2.36?api-version=2022-05-13"- 트랜잭션 아이디로 데이터 조회
curl --cacert ledger_tls.pem \
  -H "Authorization: Bearer [ACL 토큰]" \
"https://[ACL NAME].confidential-ledger.azure.com/app/transactions/2.36/receipt?api-version=2022-05-13"- 영수증 조회
- 트랜잭션 ID와 해시 값
- Merkle 트리 증명 데이터
- Ledger 서명 및 시그니처 체인
* SDK 방식
Quickstart – Microsoft Azure confidential ledger Python client library
Learn to use the Microsoft Azure confidential ledger client library for Python
learn.microsoft.com
import os, json
from azure.identity import DefaultAzureCredential
from azure.confidentialledger import ConfidentialLedgerClient
from azure.confidentialledger.certificate import ConfidentialLedgerCertificateClient

LEDGER_NAME  = ""  # ← ACL 원장 이름
LEDGER_URL   = f"https://{LEDGER_NAME}.confidential-ledger.azure.com"
IDENTITY_URL = "https://identity.confidential-ledger.core.azure.com"
TLS_PEM_PATH = f"/tmp/{LEDGER_NAME}_tls.pem"


def ensure_ledger_tls_pem():
    """
    퀵스타트 권장: CertificateClient로 원장 TLS 인증서 받아 로컬에 저장.
    """
    cert_client = ConfidentialLedgerCertificateClient(IDENTITY_URL)
    ident = cert_client.get_ledger_identity(ledger_id=LEDGER_NAME)
    pem = ident["ledgerTlsCertificate"]
    os.makedirs(os.path.dirname(TLS_PEM_PATH), exist_ok=True)
    with open(TLS_PEM_PATH, "w") as f:
        f.write(pem)


def make_client():
    """
    DefaultAzureCredential → VM MI 자동 사용.
    ledger_certificate_path로 TLS pinning.
    """
    ensure_ledger_tls_pem()
    cred = DefaultAzureCredential()  # 시스템/사용자 할당 MI 모두 지원
    return ConfidentialLedgerClient(
        endpoint=LEDGER_URL,
        credential=cred,
        ledger_certificate_path=TLS_PEM_PATH,
    )


def append_with_receipt(contents: str, collection_id: str | None = None):
    """
    1) begin_create_ledger_entry → Poller 완료 = durable commit 보장
    2) begin_get_receipt(transactionId) → 영수증 반환
    """
    client = make_client()

    # Append (durable commit까지 대기)
    poller = client.begin_create_ledger_entry(
        entry={"contents": contents},
        collection_id=collection_id,
    )
    append_result = poller.result()            # {'transactionId': 'x.y'}
    txid = append_result["transactionId"]

    # (선택) 방금 쓴 엔트리 조회 예시
    # entry = client.get_ledger_entry(transaction_id=txid)

    # Receipt
    receipt = client.begin_get_receipt(transaction_id=txid).result()  # {'receipt': {...}}

    return {
        "transactionId": txid,
        "receipt": receipt.get("receipt"),
        # "entry": entry,  # 필요 시 주석 해제
    }


if __name__ == "__main__":
    out = append_with_receipt("hello from VM Managed Identity")
print(json.dumps(out, indent=2, ensure_ascii=False))- DefaultAzureCredential() 한 줄로 토큰 발급을 자동 처리
- SDK 내부에서 Authorization 헤더 자동 추가
- TLS 인증서 경로(ledger_certificate_path)로 서버 인증서 검증
- Poller (begin_create_ledger_entry()) 방식으로 커밋 대기
DefaultAzureCredential() 인증을 담당하는 부분
Credential chains in the Azure Identity library for Python - Python on Azure
This article describes the DefaultAzureCredential and ChainedTokenCredential classes in the Azure Identity client library.
learn.microsoft.com
ManagedIdentityCredential(MI)로 특정하여 인증 및 전송하는 부분
azure.identity.ManagedIdentityCredential class
Authenticates with an Azure managed identity in any hosting environment which supports managed identities. This credential defaults to using a system-assigned identity. To configure a user-assigned identity, use one of the keyword arguments. See Microsoft
learn.microsoft.com
import os
import json
from typing import Optional

from azure.identity import ManagedIdentityCredential
from azure.confidentialledger import ConfidentialLedgerClient
from azure.confidentialledger.certificate import ConfidentialLedgerCertificateClient
from azure.core.exceptions import ClientAuthenticationError, HttpResponseError


# === 환경 설정 ===
LEDGER_NAME   = "dfdfe32"
LEDGER_URL    = f"https://{LEDGER_NAME}.confidential-ledger.azure.com"
IDENTITY_URL  = "https://identity.confidential-ledger.core.azure.com"
TLS_PEM_PATH  = f"/tmp/{LEDGER_NAME}_tls.pem"

# 🧩 사용자 할당 Managed Identity (shared-user-mi)
USER_MI_CLIENT_ID = ""  # ← 반드시 설정
COLLECTION_ID = "subledger:0"  # 없으면 None 으로 변경 가능


def ensure_ledger_tls_pem() -> None:
    """원장 TLS 인증서를 Azure Identity 서비스에서 가져와 저장 (TLS pinning)."""
    if os.path.exists(TLS_PEM_PATH):
        return
    cert_client = ConfidentialLedgerCertificateClient(IDENTITY_URL)
    ident = cert_client.get_ledger_identity(ledger_id=LEDGER_NAME)
    pem = ident["ledgerTlsCertificate"]
    os.makedirs(os.path.dirname(TLS_PEM_PATH), exist_ok=True)
    with open(TLS_PEM_PATH, "w") as f:
        f.write(pem)


def get_user_assigned_credential() -> ManagedIdentityCredential:
    """사용자 할당 Managed Identity 전용 Credential (client_id 지정 필수)."""
    return ManagedIdentityCredential(client_id=USER_MI_CLIENT_ID)


def make_client() -> ConfidentialLedgerClient:
    """Confidential Ledger 클라이언트 생성 (TLS pinning + 사용자 MI 인증)."""
    ensure_ledger_tls_pem()
    cred = get_user_assigned_credential()
    return ConfidentialLedgerClient(
        endpoint=LEDGER_URL,
        credential=cred,
        ledger_certificate_path=TLS_PEM_PATH,
    )


def append_with_receipt(contents: str, collection_id: Optional[str] = None) -> dict:
    """1) append → 2) commit 완료 → 3) receipt 조회"""
    client = make_client()

    try:
        # Append
        poller = client.begin_create_ledger_entry(
            entry={"contents": contents},
            collection_id=collection_id,
        )
        append_result = poller.result()
        txid = append_result["transactionId"]

        # 영수증
        receipt = client.begin_get_receipt(transaction_id=txid).result()

        return {
            "transactionId": txid,
            "receipt": receipt.get("receipt"),
        }

    except ClientAuthenticationError as e:
        raise RuntimeError(
            f"❌ 사용자 MI 인증 실패 — clientId={USER_MI_CLIENT_ID}.\n"
            f"해당 MI의 principalId()에 "
            f"ACL 데이터플레인 권한(Contributor/Administrator)이 부여되어 있는지 확인하세요."
        ) from e

    except HttpResponseError as e:
        raise RuntimeError(f"❌ ACL 호출 오류: {e.message}") from e


if __name__ == "__main__":
    out = append_with_receipt("hello from User-assigned Managed Identity", collection_id=COLLECTION_ID)
print(json.dumps(out, indent=2, ensure_ascii=False))- 해당 코드는 사용자 MI ClientID를 통해 인증해주는 부분이다.
- 만약 시스템 MI를 통해 인증한다면 USER_MI_CLIENT_ID 필요 없음
ClientSecretCredential(SP)로 특정하여 인증 및 전송하는 부분
azure.identity.ClientSecretCredential class
Authenticates as a service principal using a client secret.
learn.microsoft.com
import os
import json
from typing import Optional

from azure.identity import ClientSecretCredential
from azure.confidentialledger import ConfidentialLedgerClient
from azure.confidentialledger.certificate import ConfidentialLedgerCertificateClient
from azure.core.exceptions import ClientAuthenticationError, HttpResponseError

# ===== 원장 설정 =====
LEDGER_NAME   = ""
LEDGER_URL    = f"https://{LEDGER_NAME}.confidential-ledger.azure.com"
IDENTITY_URL  = "https://identity.confidential-ledger.core.azure.com"
TLS_PEM_PATH  = f"/tmp/{LEDGER_NAME}_tls.pem"
COLLECTION_ID: Optional[str] = "subledger:0"   # 필요 없으면 None

# ===== Service Principal (앱 등록) 자격 증명 — 하드코딩 버전 =====
TENANT_ID     = ""         # 디렉터리(테넌트) ID
CLIENT_ID     = ""         # 애플리케이션(클라이언트) ID
CLIENT_SECRET = ""     # 클라이언트 암호 '값' (노출 주의)

def ensure_ledger_tls_pem() -> None:
    """원장 TLS 인증서를 Identity 서비스에서 가져와 저장 (TLS pinning)."""
    if os.path.exists(TLS_PEM_PATH):
        return
    cert_client = ConfidentialLedgerCertificateClient(IDENTITY_URL)
    ident = cert_client.get_ledger_identity(ledger_id=LEDGER_NAME)
    pem = ident["ledgerTlsCertificate"]
    os.makedirs(os.path.dirname(TLS_PEM_PATH), exist_ok=True)
    with open(TLS_PEM_PATH, "w") as f:
        f.write(pem)

def get_sp_credential() -> ClientSecretCredential:
    """Service Principal(앱 등록) 자격 증명 생성."""
    return ClientSecretCredential(
        tenant_id=TENANT_ID,
        client_id=CLIENT_ID,
        client_secret=CLIENT_SECRET,
    )

def make_client() -> ConfidentialLedgerClient:
    """Confidential Ledger 클라이언트 생성 (TLS pinning + SP 인증)."""
    ensure_ledger_tls_pem()
    cred = get_sp_credential()
    return ConfidentialLedgerClient(
        endpoint=LEDGER_URL,
        credential=cred,
        ledger_certificate_path=TLS_PEM_PATH,
    )

def append_with_receipt(contents: str, collection_id: Optional[str] = None) -> dict:
    """
    1) 원장에 append (커밋 완료까지 대기)
    2) 영수증(머클 증명/서명) 조회
    """
    client = make_client()
    try:
        poller = client.begin_create_ledger_entry(
            entry={"contents": contents},
            collection_id=collection_id,
        )
        result = poller.result()                 # {"transactionId": "..."}
        txid = result["transactionId"]

        receipt = client.begin_get_receipt(transaction_id=txid).result()
        return {"transactionId": txid, "receipt": receipt.get("receipt")}

    except ClientAuthenticationError as e:
        raise RuntimeError("SP 인증 실패: 권한(Contributor/Administrator) 또는 비밀을 확인하세요.") from e
    except HttpResponseError as e:
        raise RuntimeError(f"ACL 호출 오류: {e.message}") from e

if __name__ == "__main__":
    out = append_with_receipt("hello from Service Principal", collection_id=COLLECTION_ID)
    print(json.dumps(out, indent=2, ensure_ascii=False))
'서버 > Azure' 카테고리의 다른 글
| [Azure] Frontdoor + Private Link + AppGW (0) | 2025.11.27 |
|---|---|
| [Azure] PTU(Provisioned Throughput Unit) (0) | 2025.11.26 |
| [Azure] VPN Gateway를 통해 Private AKS 접근 (P2S) (0) | 2025.10.02 |
| [Azure] AKS Node Pool (Node)에 SSH로 안전하게 접속 (0) | 2025.09.30 |
| [Azure] Managed Lustre + Blob Integration (HPC Cache 권한) (0) | 2025.09.29 |


